Full-throttle Yamaha 007-1025 User Manual
Browse online or download User Manual for Special machinery Full-throttle Yamaha 007-1025. Full Throttle Yamaha 007-1025 User Manual
- Page / 4
- Table of contents
- BOOKMARKS
Summary of Contents
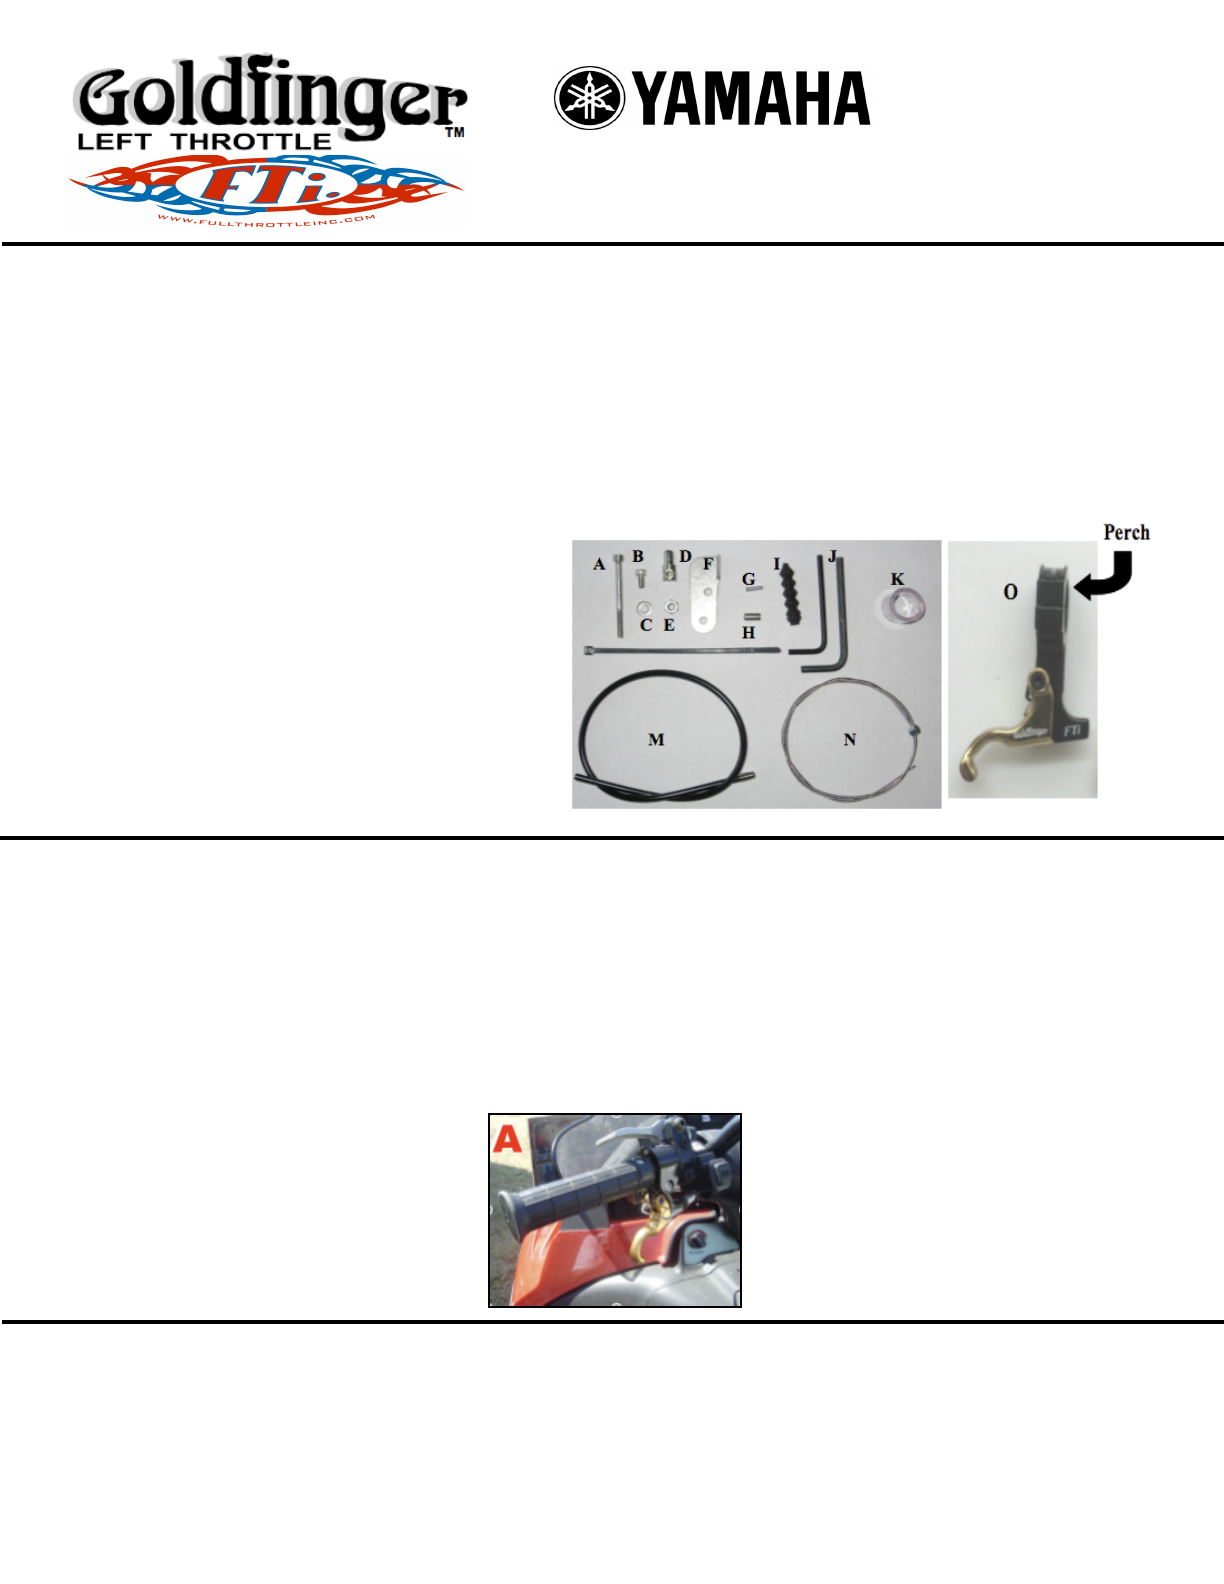
B) Installation of Right-Side Throttle Adapter Plate (See Photo B) For your convenience, the right-side cable attachment (the barrel bolt / throttle
C) Routing of Cable From Left Throttle to Right-Side Cable Attachment (See Photos C & D) (CAUTION: Your kit contains a black vinyl cable housing
PLEASE READ FOLLOWING WARNINGS AND DISCLAIMER FOR SAFE OPERATION!BEFORE EACH RIDE ✦Always inspect both ends of the cable, the left throttle lever, an
DISCLAIMER INFORMATION General Information While all of the information presented here is believed to be accurate, Full Throttle, Inc acknowledges th
Related products and manuals for Special machinery Full-throttle Yamaha 007-1025
 (4 pages)
© 2020, manymanuals.com. All rights reserved. | 0.157 s |
 Manymanuals.com
 Manymanuals.de
 Manymanuals.fr
 Manymanuals.it
 Manymanuals.pl
 Manymanuals.cz
 Manymanuals.es
 Manymanuals-pt.com
Comments to this Manuals